
One of the most important aspects of being successful on YouTube is the ability to produce content that looks and sounds as good as possible. In this blog-post, I will explain why videos from bigger YouTubers clearly look better than those from small content creators and how to replicate the great video quality that all the bigger YouTubers get by Forcing the VP9 codec on your YouTube videos!
Note that by “bigger” I refer to having more than a few thousand subscribers. However, even at zero subscribers you can get exactly the same video quality as someone with 100k+ subscribers!
VP9 vs. AVC
To get the best video quality on YouTube, you need to understand that YouTube re-encodes every video that its users upload. It does not matter if you chose the exact settings that YouTube recommends, they will ALWAYS re-encode your videos! This re-encoding occurs in two phases: First, any video is quickly re-encoded using the AVC codec and pushed as a live video to the site. Unfortunately, YouTube uses some rather poor encoding settings to generate the AVC version of any video which is why the video is re-encoded so quickly ii) the resulting video looks quite poor.
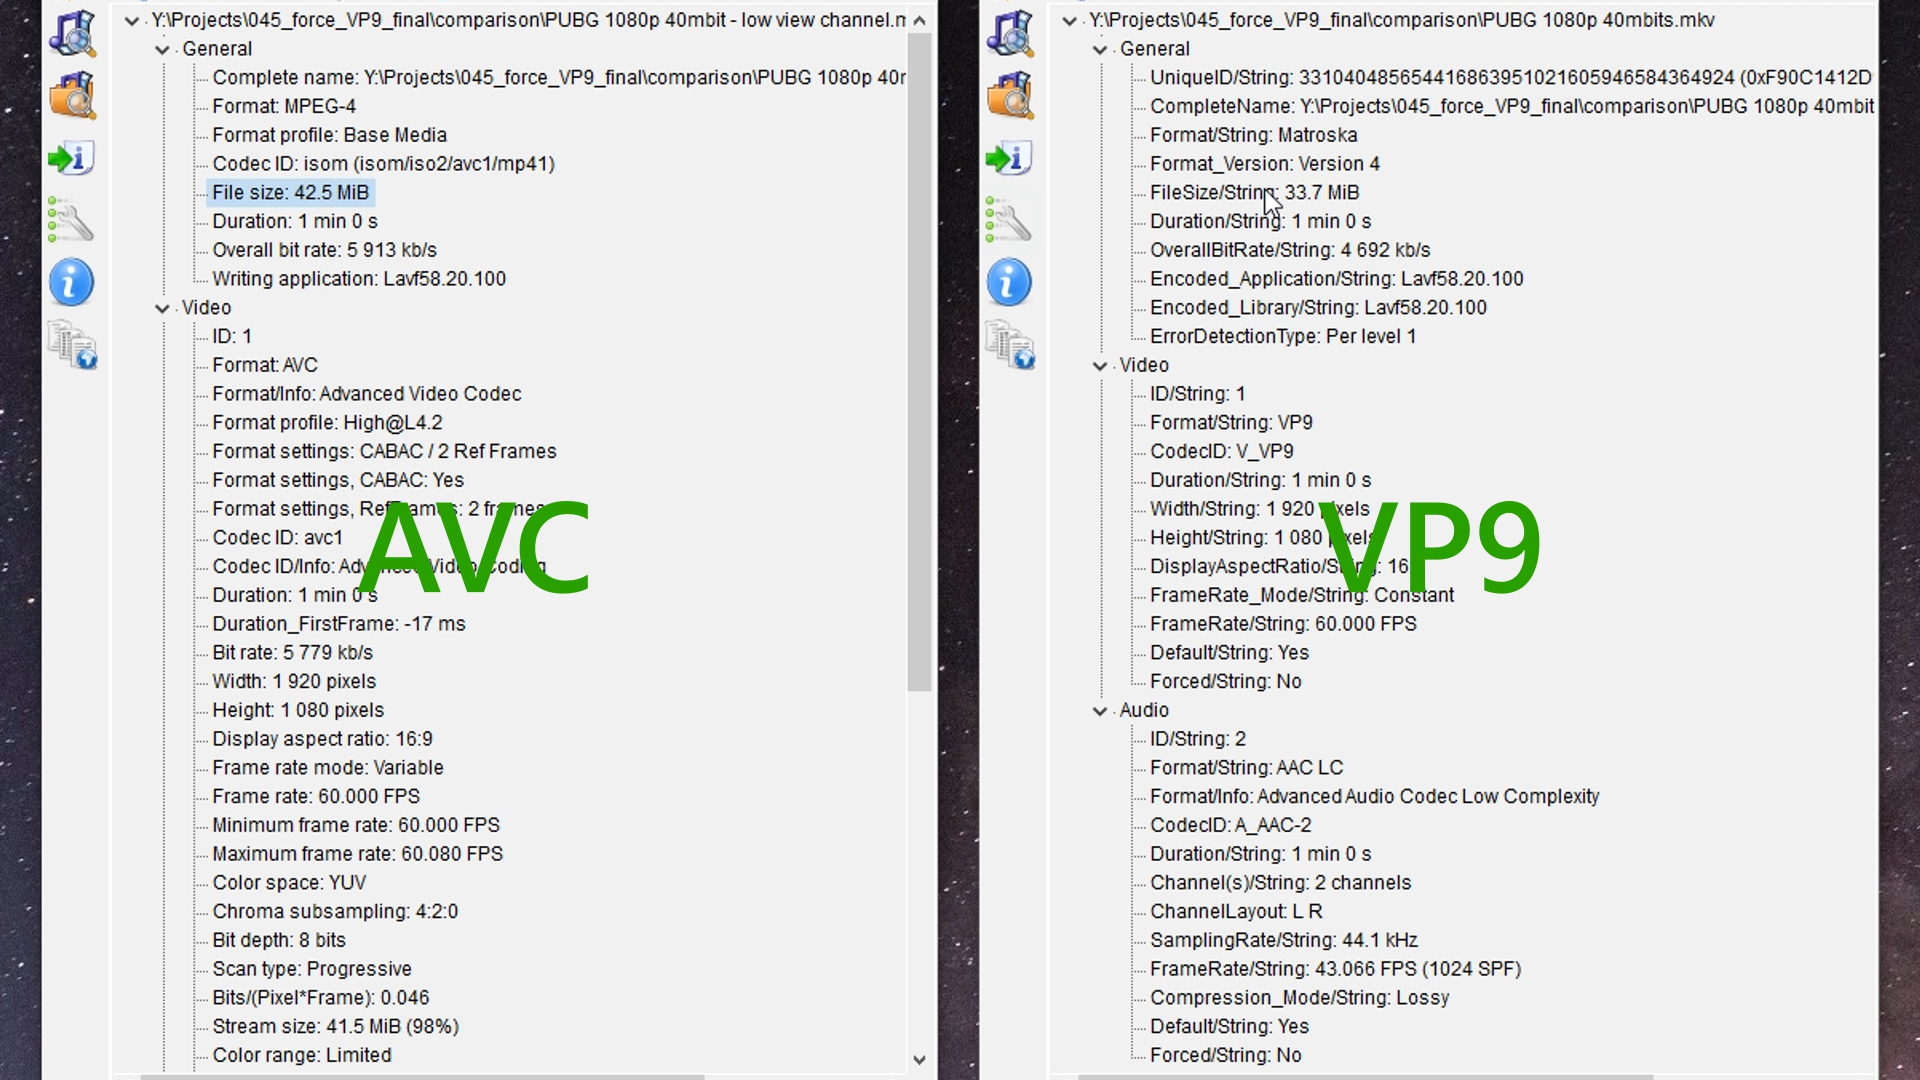
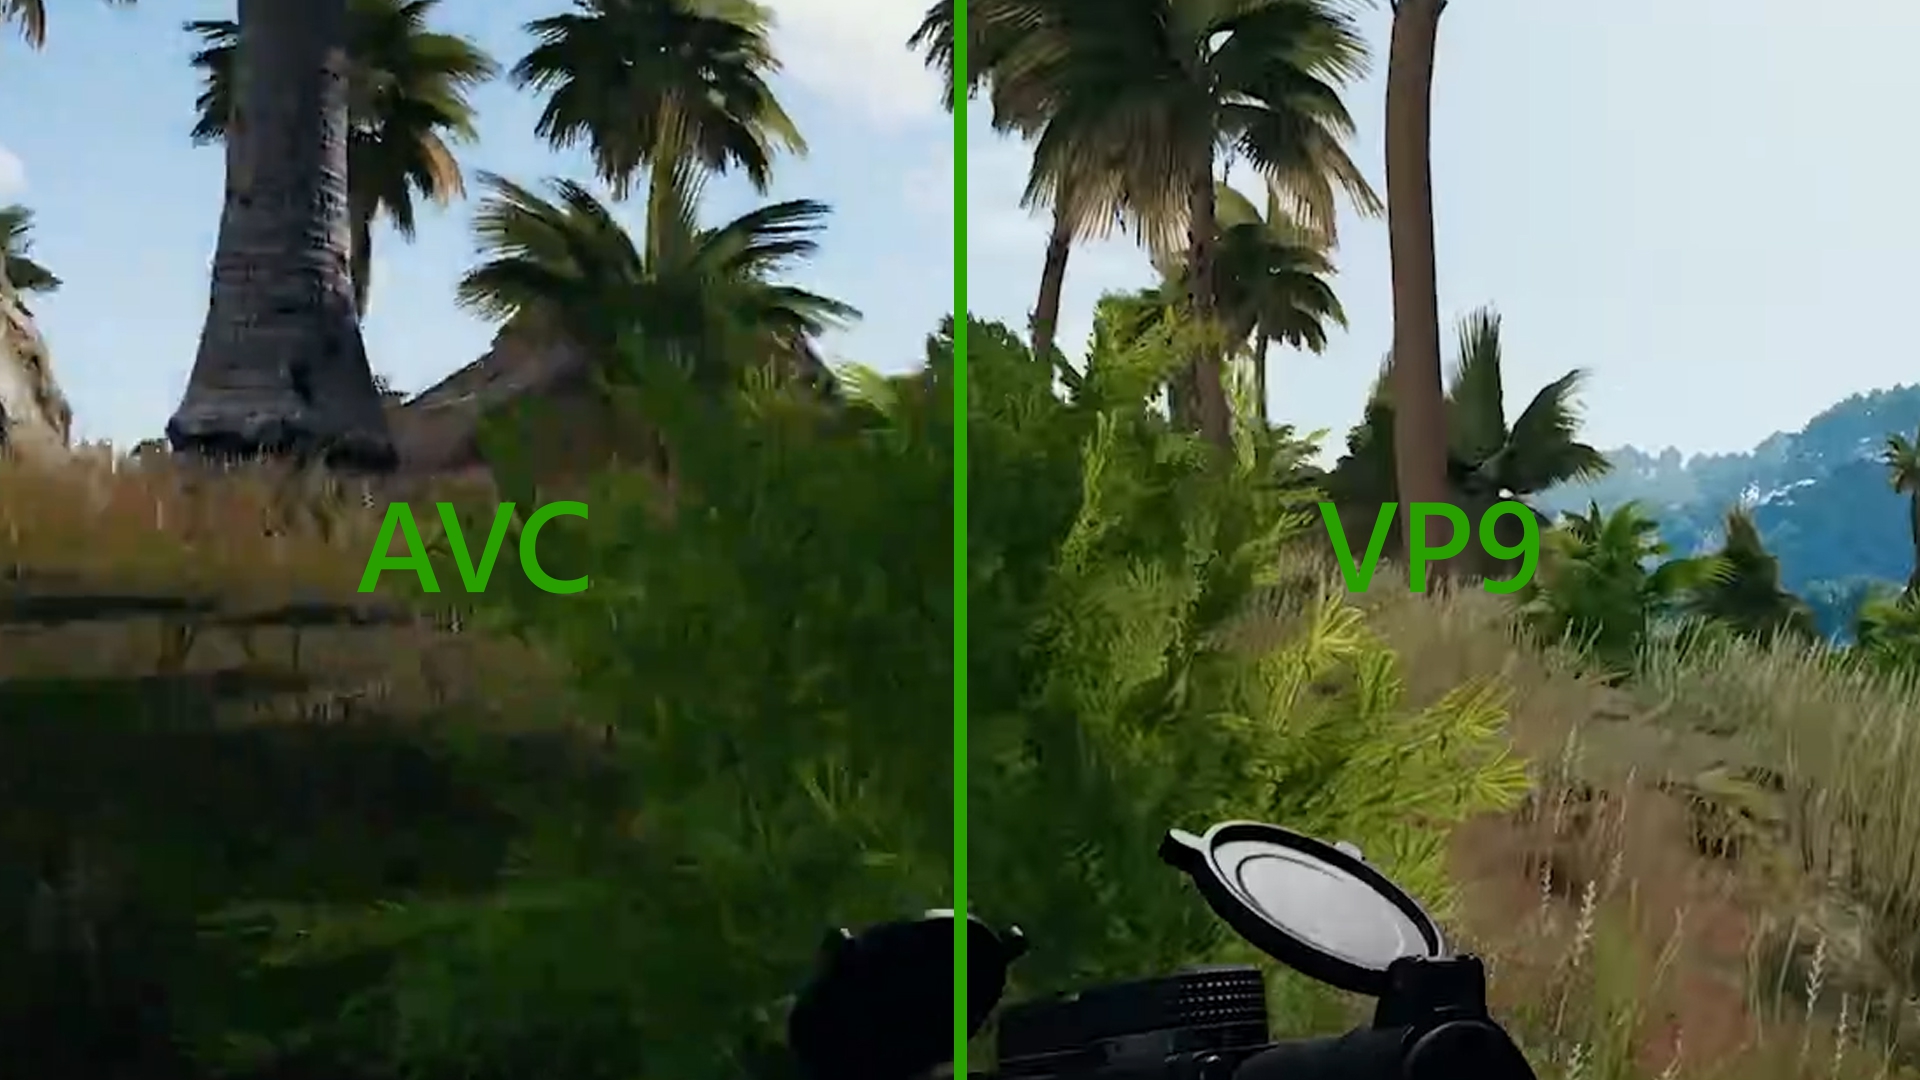
In a second phase, some videos are also re-encoded using the VP9 codec. This is basically a much improved codec which requires less bandwith while also looking much better (see images below)! The downside of VP9 is that the re-encoding process takes much longer than with AVC.
How to force VP9 on your YouTube videos
Currently, there are two ways to get the much superior VP9 codec on your YouTube videos:
- Have a lot of views (more than 1000 on any video)
- Upload your videos at the resolution of 1440p or 4K
You do not need to record at 1440p or 4K resolution to upload at these resolutions! You can simply upscale your videos, add a little bit of sharpener, and the video will look just fine! Below you can find a video which I recorded at 1080p and then up-scaled to 4K as an example!
So I found out that the 2K upload thing is a godsend and if your pc is capable switch it to H265 encoding when rendering it & it helps the quality retain even more I’d reccomend Da Vinci Resolve the free version is really, really good and since I got my 5600X it doesn’t crash anymore & the rendering only took 30 minutes for me (may vary depending on hardware)
…the downside a 1hr 28video done this way (which was a edited recording of a 6000bitrate livestream that was almost flawless btw) takes a long time the upload didn’t take long but the processing of HD does I had to wait till the next day to see the result but it was finally identical to the quality of the stream itself (which lately like I said almost flawless I just streamed Sands of Time and it was even more flawless than Valheim was I got 70Mb/s Upload so that’s prob why… but basically the stream was so clean most the time it looked like a recording)
so after seeing what AVC1 just did to my flawless looking stream (i’d argue the highest capture quality of all the other streamers streaming it even the playbacks) turning it into a video that looked more like an xbox 360 capture card video from the 2000’s or at most 2010 I have decided from now on even if i’m only editing valheim streams my other 2 games I stream I will also be converting to H265 and uploading in 1440P if the valheim one can look identical then so can this I refuse to have my face on the webcam turn into a pool of blotch blurry pixels otherwise what’s the point in having one!
I’d recommend anyone looking to improve the quality of their streams do not use the export feature on twitch just download your stream switch to h265 and 1440P on Da Vinci hit import click media and browse to find the raw footage and click import and then once it appears drag it to the timeline and edit if you want to!
Find Master Settings>Timeline and you should see the resolution don’t bother clicking the dropdown you won’t find 1440 instead go to the For Processing part and put in 2560 1440 this should stop any loss of quality as it changes to 1440 as it will already see the project as 1440p I dunno that’s what I was told so I took the pop up warning’s word for it!
When done with that click the export tab at the bottom & there you’ll see the youtube button on the left at the top right click it and change it to 1440p YT video then change encoding from h264 to h265 and click add to render que then hit begin if your pc isn’t perticularly powerful this may take a long while i’d reccomend going to do something else while it works or you’ll just be extending the time it takes and potentially increasing the chance of a render error which is what I used to get on my old processor if I tried doing anything else at the same time!
If ya got a ryzen 5 5600x and an 8gb rx580 or higher/equive it should take 30 minutes or less! Good look and I hope it works as well for you as it did me!
The exact required encoding settings from what I’ve seen is 1440p @50 fps or higher
Everything Below will use AVC1 and Everything above, VP9.
Views and Channel Subscriptions seem to also matter. Not sure how to test that part.
I’ve yet to test what works best for Youtubes internal Re-encode as a baseline. Should I just encode to h.264? Should I use like, raw file formats? Or Apple’s ProRes? or AV1?. Many unanswered questions on this topic it seems.
Is there any way as a YouTube viewer to force VP9? I have a few videos that I know were encoded VP9, but my browser or whatever won’t use it.
go to the toob /account_playback you can only prefer AV1 it would seem, but it will use VP9 upon enabling a misleading option, “Prefer AV1 for SD”.
under “AV1 settings” you have two radials;
Prefer AV1 for SD:
Streaming AV1 in SD will use AV1 up to 480p, and use VP9 for higher-resolution formats.
Always prefer AV1:
Streaming AV1 in HD requires a powerful computer, and only some videos have AV1 available at this time.
note that I only JUST discovered this stuff myself, I’d never heard either of these terms until about 10 minutes ago.